Heroes Cloe Light
Light Design
Role
Design conception / CAD / Prototyping
Tools
Rhino3D / 3D Printing / Laser Cutter / Papercut Modelling / Keyshot

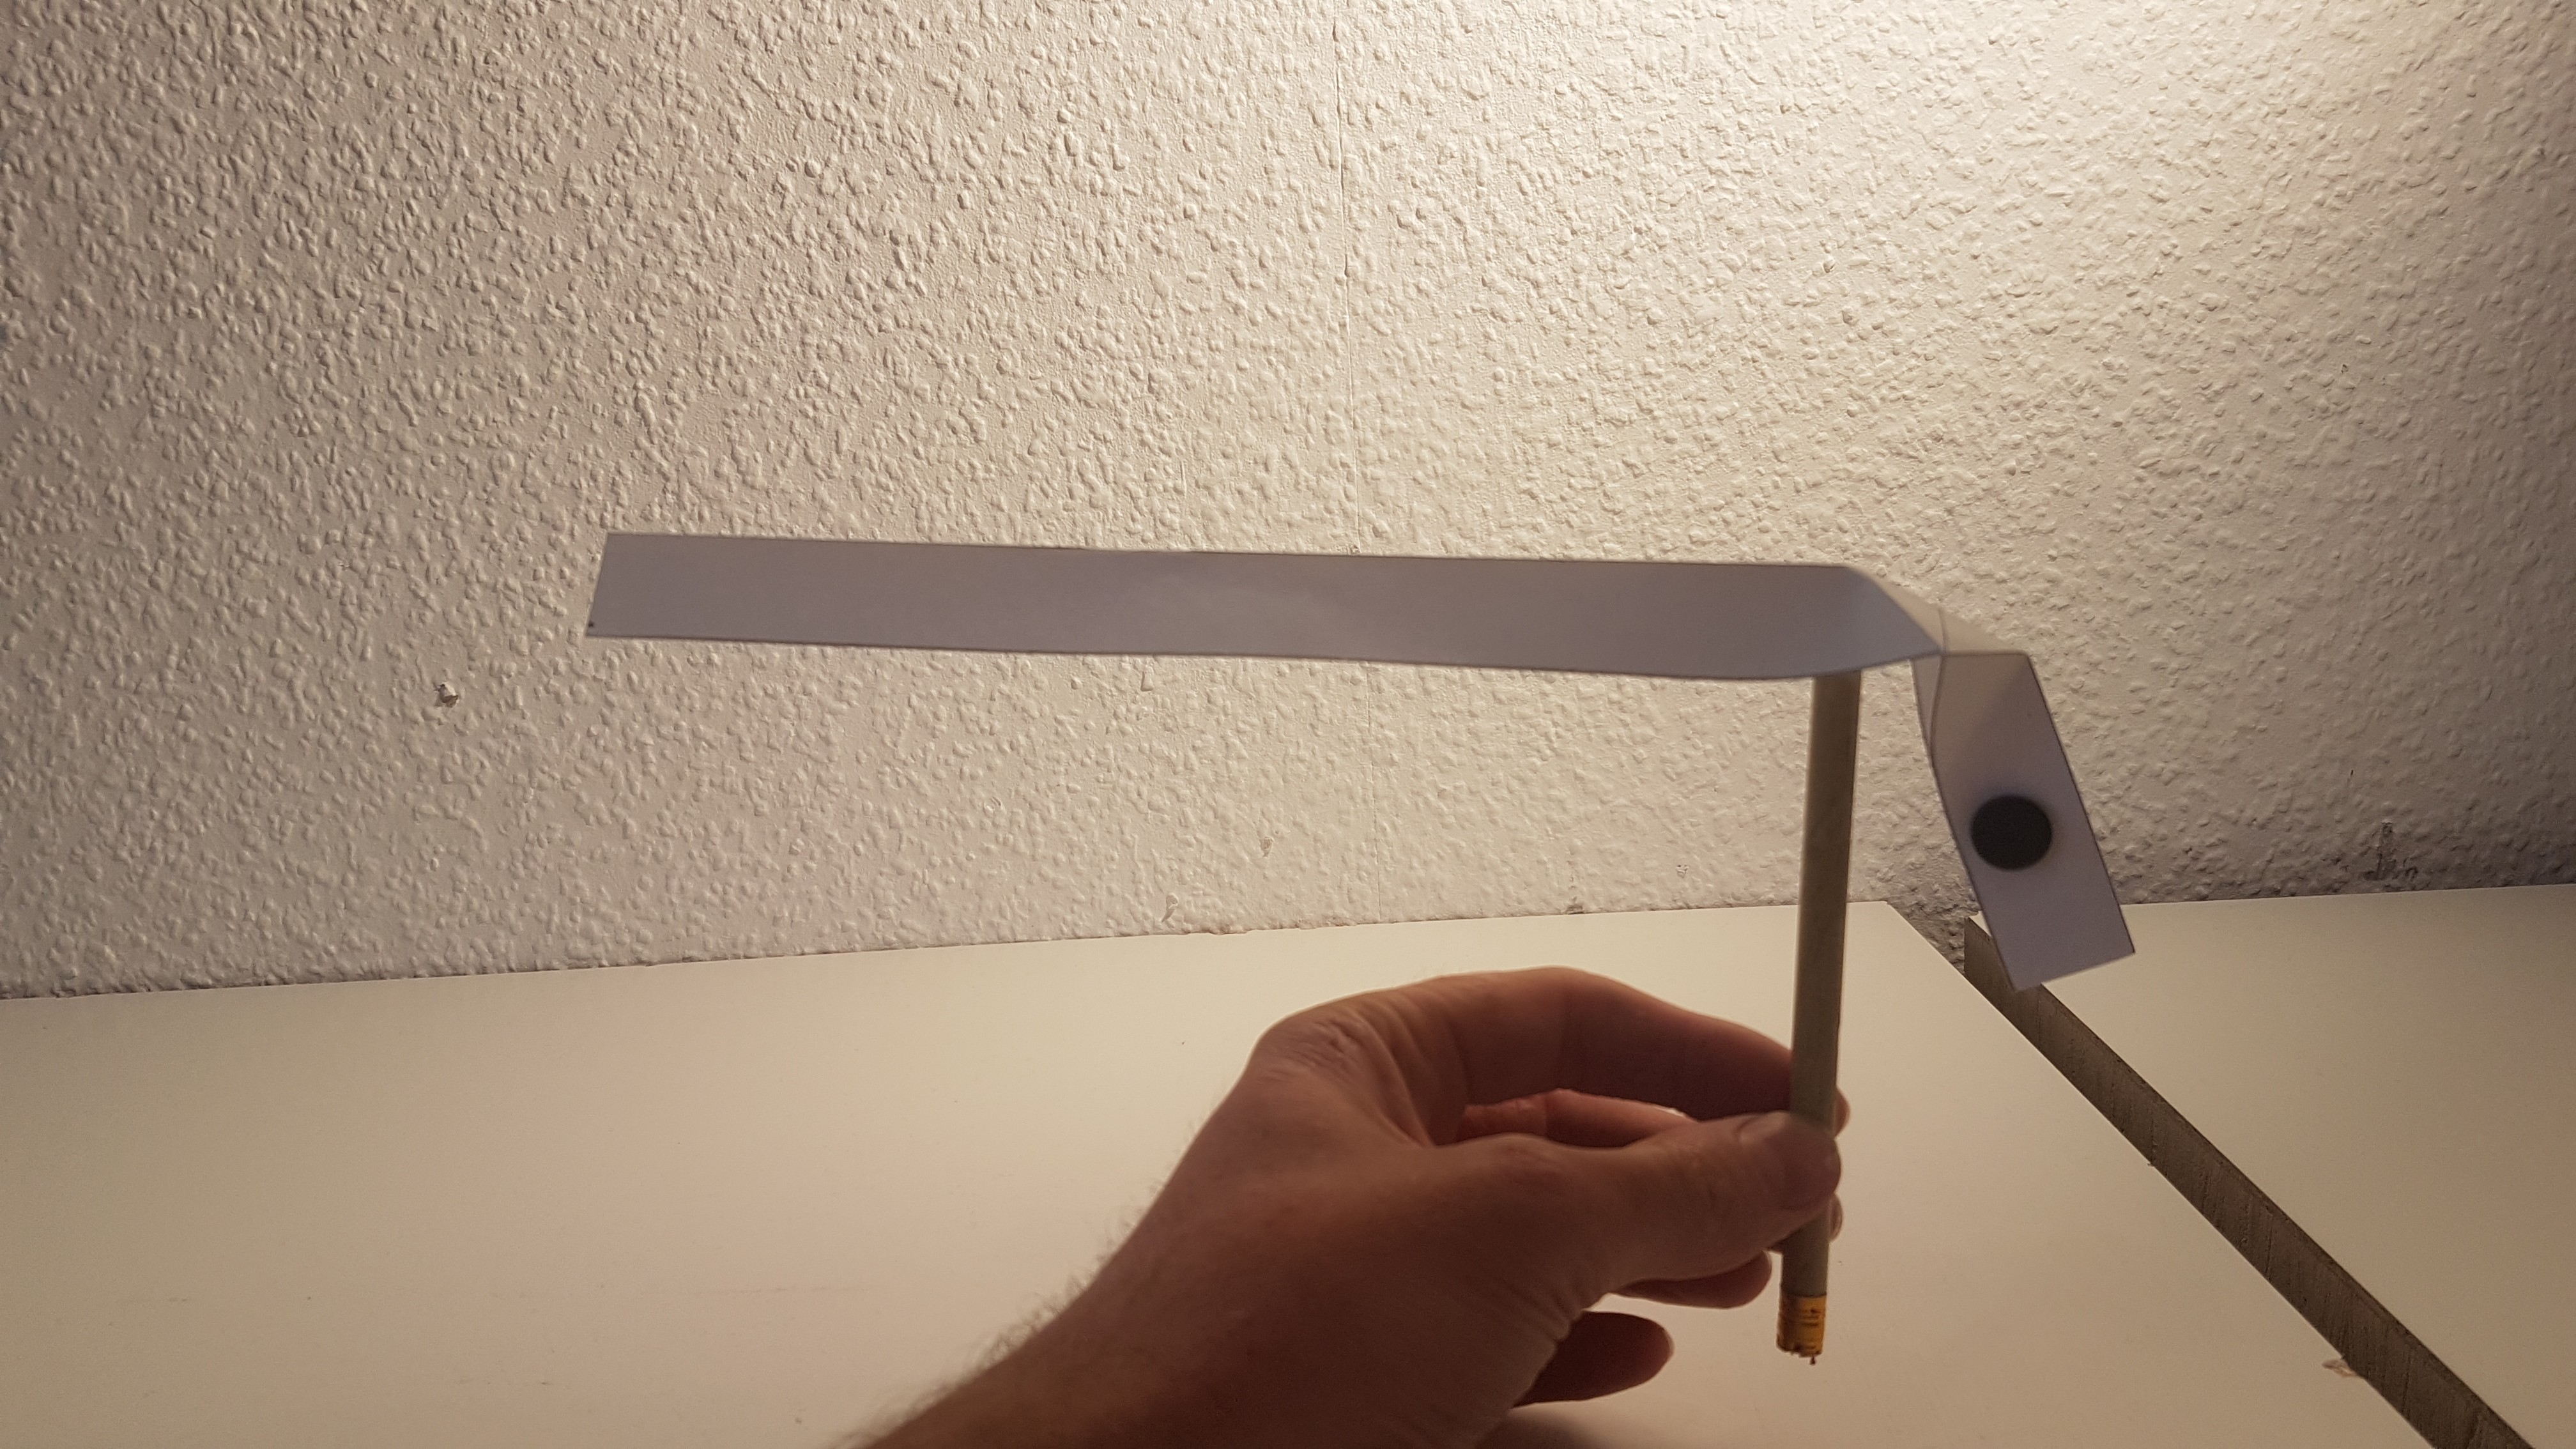
Stage 1. Papercut Models
In this design process, I focused on developing an individual design through targeted folds and bends. My goal was to create a stable structure with few but precise folds, making the product cost-effective in later production. With an efficient folding approach, I aim to maximize the design potential.
Stage 2. Prototype Development
Papercut Model:
In the Papercut model, I measured all dimensions, angles, and surfaces and accurately transferred them to CAD.
CAD Model:
The biggest challenge was to precisely assemble the components and determine the optimal angle to accurately transfer the aesthetics of the Papercut model into the CAD model.


Stage 4. Dimensioning
The dimensioning was developed for production to provide the correct data for manufacturing. The screen is to be punched from metal and then bent using a tool.
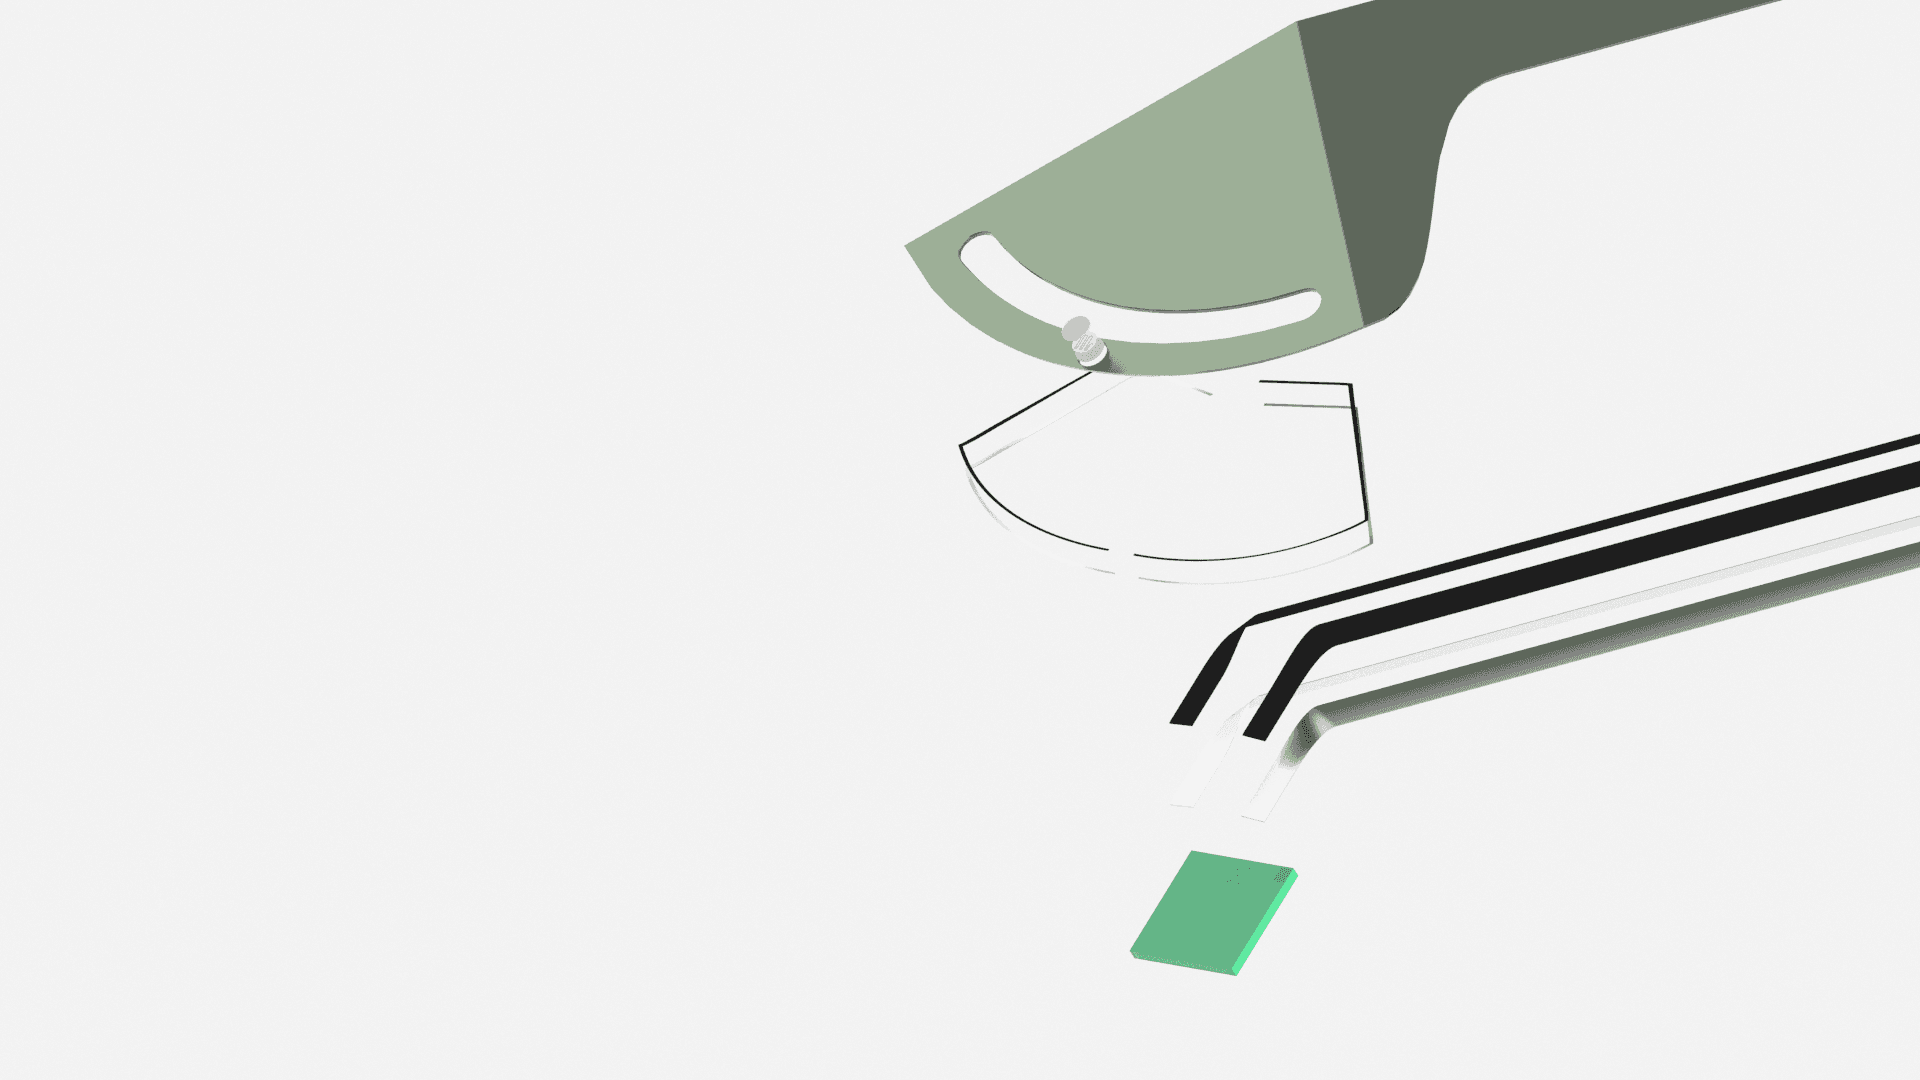
Stage 5. Rendering
The rendering shows the materiality and individual components in an exploded view. It helps to understand how the product is assembled and how the components fit together. It also highlights which materials play a role and how they are specifically used.

Heroes Cloe Light
Light Design
Role
Design conception / CAD / Prototyping
Tools
Rhino3D / 3D Printing / Laser Cutter / Papercut Modelling / Keyshot
Stage 1. Papercut Models
In this design process, I focused on developing an individual design through targeted folds and bends. My goal was to create a stable structure with few but precise folds, making the product cost-effective in later production. With an efficient folding approach, I aim to maximize the design potential.
Stage 2. Prototype Development
Papercut Model:
In the Papercut model, I measured all dimensions, angles, and surfaces and accurately transferred them to CAD.
CAD Model:
The biggest challenge was to precisely assemble the components and determine the optimal angle to accurately transfer the aesthetics of the Papercut model into the CAD model.
Stage 4. Dimensioning
The dimensioning was developed for production to provide the correct data for manufacturing. The screen is to be punched from metal and then bent using a tool.
Stage 5. Rendering
The rendering shows the materiality and individual components in an exploded view. It helps to understand how the product is assembled and how the components fit together. It also highlights which materials play a role and how they are specifically used.

Screw Dna / AI Algorythm
Startup / Design

Aware / AI Design
Datadriven Urban Development

Brand Strategie / B2B Portfolio
Customer: Startup Pinheiro Beans